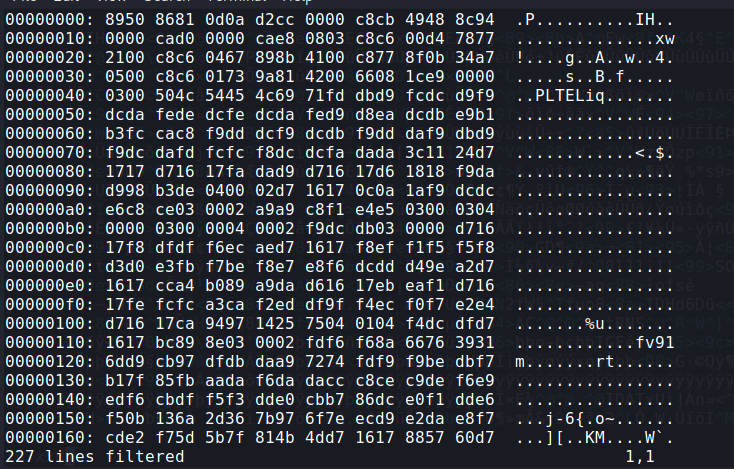
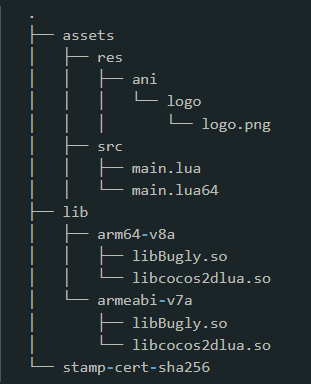
综上,我们需要实现的目标
LuaJit 反汇编这个不多介绍了窝,在理论篇中已经提到了。对于此样本的LuaJit的版本是2.1.0-Beta2,并且没有魔改Opcode
Lua文件加载流程想要解密.lua文件,了解coco2d-x加载Lua的流程必不可少
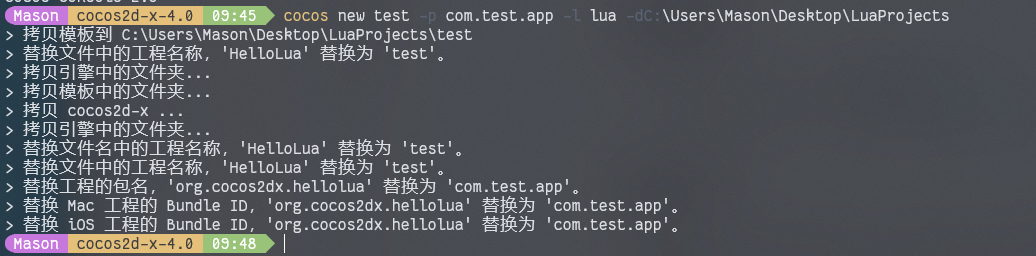
Cocos2d-x环境搭建从Android Activity揭秘cocos2d-x的世界由于Android的应用层是从Activity开始的,也就是创建完一个Cocos2dx后src文件夹下的Java文件,其中主要看Activity创建时的操作
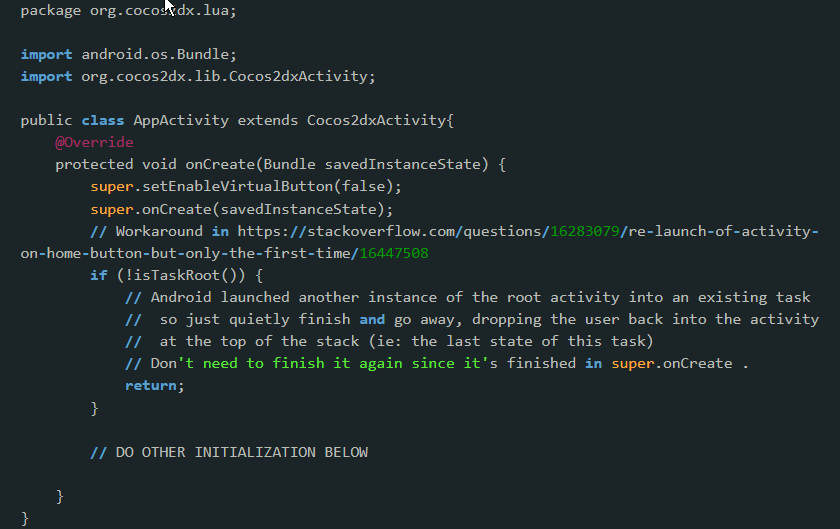
这个方法很简单,就只调用了父类Cocos2dxActivity的onCreate方法
- @Override
- protected void onCreate(final Bundle savedInstanceState) {
- super.onCreate(savedInstanceState);
-
- // Workaround in https://stackoverflow.com/questions/16283079/re-launch-of-activity-on-home-button-but-only-the-first-time/16447508
- if (!isTaskRoot()) {
- // Android launched another instance of the root activity into an existing task
- // so just quietly finish and go away, dropping the user back into the activity
- // at the top of the stack (ie: the last state of this task)
- finish();
- Log.w(TAG, "[Workaround] Ignore the activity started from icon!");
- return;
- }
-
- this.hideVirtualButton();
-
- onLoadNativeLibraries();
-
- sContext = this;
- this.mHandler = new Cocos2dxHandler(this);
-
- Cocos2dxHelper.init(this);
-
- this.mGLContextAttrs = getGLContextAttrs();
- this.init();
-
- if (mVideoHelper == null) {
- mVideoHelper = new Cocos2dxVideoHelper(this, mFrameLayout);
- }
-
- if(mWebViewHelper == null){
- mWebViewHelper = new Cocos2dxWebViewHelper(mFrameLayout);
- }
-
- if(mEditBoxHelper == null){
- mEditBoxHelper = new Cocos2dxEditBoxHelper(mFrameLayout);
- }
-
- Window window = this.getWindow();
- window.setSoftInputMode(WindowManager.LayoutParams.SOFT_INPUT_ADJUST_PAN);
-
- // Audio configuration
- this.setVolumeControlStream(AudioManager.STREAM_MUSIC);
- }
在这个方法中主要看Cocos2dxActivity的初始化方法init,Cocos2dxHandler是工具辅助类,不是重点。
- public Cocos2dxGLSurfaceView onCreateView() {
- Cocos2dxGLSurfaceView glSurfaceView = new Cocos2dxGLSurfaceView(this);
- //this line is need on some device if we specify an alpha bits
- // FIXME: is it needed? And it will cause afterimage.
- // if(this.mGLContextAttrs[3] > 0) glSurfaceView.getHolder().setFormat(PixelFormat.TRANSLUCENT);
-
- // use custom EGLConfigureChooser
- Cocos2dxEGLConfigChooser chooser = new Cocos2dxEGLConfigChooser(this.mGLContextAttrs);
- glSurfaceView.setEGLConfigChooser(chooser);
-
- return glSurfaceView;
- }
- // ......
- public void init() {
-
- // FrameLayout 初始化窗口布局
- ViewGroup.LayoutParams framelayout_params =
- new ViewGroup.LayoutParams(ViewGroup.LayoutParams.MATCH_PARENT,
- ViewGroup.LayoutParams.MATCH_PARENT);
-
- mFrameLayout = new ResizeLayout(this);
-
- mFrameLayout.setLayoutParams(framelayout_params);
-
- // Cocos2dxEditText layout 初始化Cocos2dx的文本编辑布局
- ViewGroup.LayoutParams edittext_layout_params =
- new ViewGroup.LayoutParams(ViewGroup.LayoutParams.MATCH_PARENT,
- ViewGroup.LayoutParams.WRAP_CONTENT);
- Cocos2dxEditBox edittext = new Cocos2dxEditBox(this);
- edittext.setLayoutParams(edittext_layout_params);
-
-
- mFrameLayout.addView(edittext);
-
- // Cocos2dxGLSurfaceView 初始化Cocos2dx视图
- this.mGLSurfaceView = this.onCreateView();
-
- // ...add to FrameLayout 将Cocos2dxGLSurfaceView加入到当前的窗口布局中
- mFrameLayout.addView(this.mGLSurfaceView);
-
- // Switch to supported OpenGL (ARGB888) mode on emulator
- // this line dows not needed on new emulators and also it breaks stencil buffer
- //if (isAndroidEmulator()) // 在模拟器中切换支持OpenGL模式的渲染(ARGB888)
- // this.mGLSurfaceView.setEGLConfigChooser(8, 8, 8, 8, 16, 0);
-
- // 设置Cocos2dx的渲染器
- this.mGLSurfaceView.setCocos2dxRenderer(new Cocos2dxRenderer());
- //设置Cocos2dx的文本编辑
- this.mGLSurfaceView.setCocos2dxEditText(edittext);
-
- // Set framelayout as the content view
- // 把显示布局(即Cocos2dx的视图)绑定到Activity上,建立显示窗口
- setContentView(mFrameLayout);
- }
首先在init中先看this.mGLSurfaceView = this.onCreateView();this.mGLSurfaceView是一个Cocos2dxGLSurfaceView类
进入到Cocos2dxGLSurfaceView这个类,可以看到时继承于GLSurfaceView(可以把GLSurfaceView看成一个视图,里面有个方法设置了这个视图的渲染器,然后通过这个渲染器来进行画面的渲染)
在Android中,GLSurfaceView是一个支持OpenGL的渲染视图,通过继承SurfaceView中的surface来渲染OpenGL
并提供了以下特性(来源于网上)
- 管理一个surface,这个surface就是一块特殊的内存,能直接排版到android的视图view上
- 管理一个EGL display,它能让opengl把内容渲染到上述的surface上
- 用户自定义渲染器(render)
- 让渲染器在独立的线程里运作,和UI线程分离
- 支持按需渲染(on-demand)和连续渲染(continuous)
- 一些可选工具,如调试
重点是自定义的渲染器,也就是Cocos2dx引擎封装的渲染器
进入Cocos2dxRenderer类,看到他是继承GLSurfaceView.Renderer接口,这个接口定义了三个方法:
- onSurfaceCreated: 创建GLSurfaceView时被调用,只调用一次,做初始化工作
- onSurfaceChanged: 当GLSurfaceView的几何体被改变时被调用
- onDrawFrame: 绘制渲染GLSurfaceView
onSurfaceCreated
- @Override
- public void onSurfaceCreated(final GL10 GL10, final EGLConfig EGLConfig) {
- Cocos2dxRenderer.nativeInit(this.mScreenWidth, this.mScreenHeight);
- this.mLastTickInNanoSeconds = System.nanoTime();
- mNativeInitCompleted = true;
- }
nativeInit是一个Native函数
- private static native void nativeInit(final int width, final int height);
具体实现在frameworks\cocos2d-x\cocos\platform\android\javaactivity-android.cpp中
- JNIEXPORT void Java_org_cocos2dx_lib_Cocos2dxRenderer_nativeInit(JNIEnv* env, jobject thiz, jint w, jint h)
- {
- auto director = cocos2d::Director::getInstance();
- auto glview = director->getOpenGLView();
- if (!glview)
- {
- glview = cocos2d::GLViewImpl::create("Android app");
- glview->setFrameSize(w, h);
- director->setOpenGLView(glview);
-
- cocos2d::Application::getInstance()->run();
- }
- else
- {
- cocos2d::Director::getInstance()->resetMatrixStack();
- cocos2d::EventCustom recreatedEvent(EVENT_RENDERER_RECREATED);
- director->getEventDispatcher()->dispatchEvent(&recreatedEvent);
- director->setGLDefaultValues();
- cocos2d::VolatileTextureMgr::reloadAllTextures();
- }
- cocos2d::network::_preloadJavaDownloaderClass();
- }
重点是cocos2d::Application::getInstance()->run()
- int Application::run()
- {
- // Initialize instance and cocos2d.
- if (! applicationDidFinishLaunching())
- {
- return 0;
- }
-
- return -1;
- }
applicationDidFinishLaunching,没错这就是游戏逻辑的入口了
- bool AppDelegate::applicationDidFinishLaunching()
- {
- // set default FPS
- Director::getInstance()->setAnimationInterval(1.0 / 60.0f);
-
- // register lua module
-
- // 初始化 LuaEngine, 在 getInstance 中会初始化 LuaStack, LuaStack 初始化 Lua 环境相关
- auto engine = LuaEngine::getInstance();
- // 将 LuaEngine 添加到脚本引擎管理器 ScriptEngineManager 中
- ScriptEngineManager::getInstance()->setScriptEngine(engine);
- // 获取 Lua 环境
- lua_State* L = engine->getLuaStack()->getLuaState();
- // 注册额外的 C++ API 相关,比如 cocosstudio, spine, audio 相关
- lua_module_register(L);
-
- // 设置 cocos 自带的加密相关
- register_all_packages();
-
- // 在 LuaStack::executeScriptFile 执行脚本文件时,会通过 LuaStack::luaLoadBuffer 对文件进行解密
- LuaStack* stack = engine->getLuaStack();
- stack->setXXTEAKeyAndSign("2dxLua", strlen("2dxLua"), "XXTEA", strlen("XXTEA"));
-
- //register custom function
- //LuaStack* stack = engine->getLuaStack();
- //register_custom_function(stack->getLuaState());
-
- #if CC_64BITS
- FileUtils::getInstance()->addSearchPath("src/64bit");
- #endif
- FileUtils::getInstance()->addSearchPath("src");
- FileUtils::getInstance()->addSearchPath("res");
- if (engine->executeScriptFile("main.lua"))
- {
- return false;
- }
-
- return true;
- }
LuaEngine::getInstance();这段代码实例化了LuaEngine
下面分析LuaEngine初始化过程
- LuaEngine* LuaEngine::getInstance(void)
- {
- if (!_defaultEngine)
- {
- _defaultEngine = new (std::nothrow) LuaEngine();
- _defaultEngine->init();
- }
- return _defaultEngine;
- }
接下来是_defaultEngine->init();
- bool LuaEngine::init(void)
- {
- _stack = LuaStack::create();
- _stack->retain();
- return true;
- }
继续进入
- LuaStack *LuaStack::create()
- {
- LuaStack *stack = new (std::nothrow) LuaStack();
- stack->init();
- stack->autorelease();
- return stack;
- }
下面是stack->init()
- bool LuaStack::init()
- {
- // 初始化Lua环境并打开标准库
- _state = lua_open();
- luaL_openlibs(_state);
- toluafix_open(_state);
-
- // Register our version of the global "print" function
- // 注册全局函数print到lua中,它会覆盖lua库中的print方法
- const luaL_Reg global_functions [] = {
- {"print", lua_print},
- {"release_print",lua_release_print},
- {nullptr, nullptr}
- };
- // 注册全局变量
- luaL_register(_state, "_G", global_functions);
-
- // 注册cocos2d-x引擎的API到lua环境中
- g_luaType.clear();
- register_all_cocos2dx(_state);
- register_all_cocos2dx_backend(_state);
- register_all_cocos2dx_manual(_state);
- register_all_cocos2dx_module_manual(_state);
- register_all_cocos2dx_math_manual(_state);
- register_all_cocos2dx_shaders_manual(_state);
- register_all_cocos2dx_bytearray_manual(_state);
-
- tolua_luanode_open(_state);
- register_luanode_manual(_state);
- #if CC_USE_PHYSICS
- // 导入使用的physics相关API
- register_all_cocos2dx_physics(_state);
- register_all_cocos2dx_physics_manual(_state);
- #endif
-
- #if (CC_TARGET_PLATFORM == CC_PLATFORM_IOS || CC_TARGET_PLATFORM == CC_PLATFORM_MAC)
- // 导入ios下调用object-c相关API
- LuaObjcBridge::luaopen_luaoc(_state);
- #endif
-
- #if (CC_TARGET_PLATFORM == CC_PLATFORM_ANDROID)
- // 导入android下调用java相关API
- LuaJavaBridge::luaopen_luaj(_state);
- #endif
- register_all_cocos2dx_deprecated(_state);
- register_all_cocos2dx_manual_deprecated(_state);
-
- tolua_script_handler_mgr_open(_state);
-
- // add cocos2dx loader
- // 添加Lua的加载器,该方法将cocos2dx_lua_loader方法添加到Lua全局变量package下的loaders成员中
- // 当requires加载脚本时,Lua会使用package下的loaders中的加载器,即cocos2dx_lua_loader来加载
- // 设定cocos2dx_lua_loader,可以使得我们自定义设置搜索路径相关,且拓展实现对脚本的加密解密相关
- addLuaLoader(cocos2dx_lua_loader);
-
- return true;
- }
重点在cocos2dx_lua_loader方法(这个方法在frameworks\cocos2d-x\cocos\scripting\lua-bindings\manual\Cocos2dxLuaLoader.cpp)
- int cocos2dx_lua_loader(lua_State *L)
- {
- // 后缀为luac和lua
- static const std::string BYTECODE_FILE_EXT = ".luac";
- static const std::string NOT_BYTECODE_FILE_EXT = ".lua";
-
- // require传入的要加载的文件名,例如:require("a.b") 查找文件为:a/b.lua
- std::string filename(luaL_checkstring(L, 1));
- size_t pos = filename.rfind(BYTECODE_FILE_EXT);
- // 去掉后缀名".luac"或“.lua”
- if (pos != std::string::npos && pos == filename.length() - BYTECODE_FILE_EXT.length())
- filename = filename.substr(0, pos);
- else
- {
- pos = filename.rfind(NOT_BYTECODE_FILE_EXT);
- if (pos != std::string::npos && pos == filename.length() - NOT_BYTECODE_FILE_EXT.length())
- filename = filename.substr(0, pos);
- }
-
- // 将 "." 替换为 "/"
- pos = filename.find_first_of('.');
- while (pos != std::string::npos)
- {
- filename.replace(pos, 1, "/");
- pos = filename.find_first_of('.');
- }
-
- // search file in package.path
- Data chunk;
- std::string chunkName;
- FileUtils* utils = FileUtils::getInstance();
-
- // 获取 package.path 的变量
- lua_getglobal(L, "package");
- lua_getfield(L, -1, "path");
- // 通过 package.path 获取搜索路径相关,该路径为模版路径,格式类似于:
- // ?; ?.lua; c:\Users\?; /usr/local/lua/lua/?/?.lua 以“;”作为分割符
- std::string searchpath(lua_tostring(L, -1));
- lua_pop(L, 1);
- size_t begin = 0;
- size_t next = searchpath.find_first_of(';', 0);
-
- // 遍历 package.path 中的所有路径,查找文件是否存在,若文件存在则通过 getDataFromFile 读取文件数据
- do
- {
- if (next == std::string::npos)
- next = searchpath.length();
- std::string prefix = searchpath.substr(begin, next-begin);
- if (prefix[0] == '.' && prefix[1] == '/')
- prefix = prefix.substr(2);
-
- pos = prefix.rfind(BYTECODE_FILE_EXT);
- if (pos != std::string::npos && pos == prefix.length() - BYTECODE_FILE_EXT.length())
- {
- prefix = prefix.substr(0, pos);
- }
- else
- {
- pos = prefix.rfind(NOT_BYTECODE_FILE_EXT);
- if (pos != std::string::npos && pos == prefix.length() - NOT_BYTECODE_FILE_EXT.length())
- prefix = prefix.substr(0, pos);
- }
- pos = prefix.find_first_of('?', 0);
- while (pos != std::string::npos)
- {
- prefix.replace(pos, 1, filename);
- pos = prefix.find_first_of('?', pos + filename.length() + 1);
- }
-
- chunkName = prefix + BYTECODE_FILE_EXT;
- if (utils->isFileExist(chunkName)) // && !utils->isDirectoryExist(chunkName))
- {
- chunk = utils->getDataFromFile(chunkName);
- break;
- }
- else
- {
- chunkName = prefix + NOT_BYTECODE_FILE_EXT;
- if (utils->isFileExist(chunkName) ) //&& !utils->isDirectoryExist(chunkName))
- {
- chunk = utils->getDataFromFile(chunkName);
- break;
- }
- else
- {
- chunkName = prefix;
- if (utils->isFileExist(chunkName)) // && !utils->isDirectoryExist(chunkName))
- {
- chunk = utils->getDataFromFile(chunkName);
- break;
- }
- }
- }
-
- // 指定搜素路径下不存在该文件, 下一个
- begin = next + 1;
- next = searchpath.find_first_of(';', begin);
- } while (begin < searchpath.length());
- // 判断文件内容是否获取成功
- if (chunk.getSize() > 0)
- {
- // 加载文件
- LuaStack* stack = LuaEngine::getInstance()->getLuaStack();
- stack->luaLoadBuffer(L, reinterpret_cast<const char*>(chunk.getBytes()),
- static_cast<int>(chunk.getSize()), chunkName.c_str());
- }
- else
- {
- CCLOG("can not get file data of %s", chunkName.c_str());
- return 0;
- }
-
- return 1;
- }
通过此处的代码,可以了解到cocos2d-x是如何搜索指定的lua文件
同时也会明白require为何可以使用 "." 来设定文件路径了,比如:
- require "cocos.cocos2d.Cocos2d"
- require "cocos.cocos2d.Cocos2dConstants"
- require "cocos.cocos2d.functions"
再来看下stack->luaLoadBuffer的实现:
- int LuaStack::luaLoadBuffer(lua_State *L, const char *chunk, int chunkSize, const char *chunkName)
- {
- int r = 0;
-
- // 判断是否加密,若lua脚本加密,则解密后在加载脚本文件
- // luaL_loadbuffer 用于加载并编译Lua代码,并将其压入栈中
- if (_xxteaEnabled && strncmp(chunk, _xxteaSign, _xxteaSignLen) == 0)
- {
- // decrypt XXTEA
- xxtea_long len = 0;
- unsigned char* result = xxtea_decrypt((unsigned char*)chunk + _xxteaSignLen,
- (xxtea_long)chunkSize - _xxteaSignLen,
- (unsigned char*)_xxteaKey,
- (xxtea_long)_xxteaKeyLen,
- &len);
- unsigned char* content = result;
- xxtea_long contentSize = len;
- skipBOM((const char*&)content, (int&)contentSize);
- r = luaL_loadbuffer(L, (char*)content, contentSize, chunkName);
- free(result);
- }
- else
- {
- skipBOM(chunk, chunkSize);
- r = luaL_loadbuffer(L, chunk, chunkSize, chunkName);
- }
-
- // 判定内容是否存在错误
- #if defined(COCOS2D_DEBUG) && COCOS2D_DEBUG > 0
- if (r)
- {
- switch (r)
- {
- case LUA_ERRSYNTAX:
- // 语法错误
- CCLOG("[LUA ERROR] load "%s", error: syntax error during pre-compilation.", chunkName);
- break;
-
- case LUA_ERRMEM:
- // 内存分配错误
- CCLOG("[LUA ERROR] load "%s", error: memory allocation error.", chunkName);
- break;
-
- case LUA_ERRFILE:
- // 文件错误
- CCLOG("[LUA ERROR] load "%s", error: cannot open/read file.", chunkName);
- break;
-
- default:
- // 未知错误
- CCLOG("[LUA ERROR] load "%s", error: unknown.", chunkName);
- }
- }
- #endif
- return r;
- }
至此,Lua文件的加载流程结束
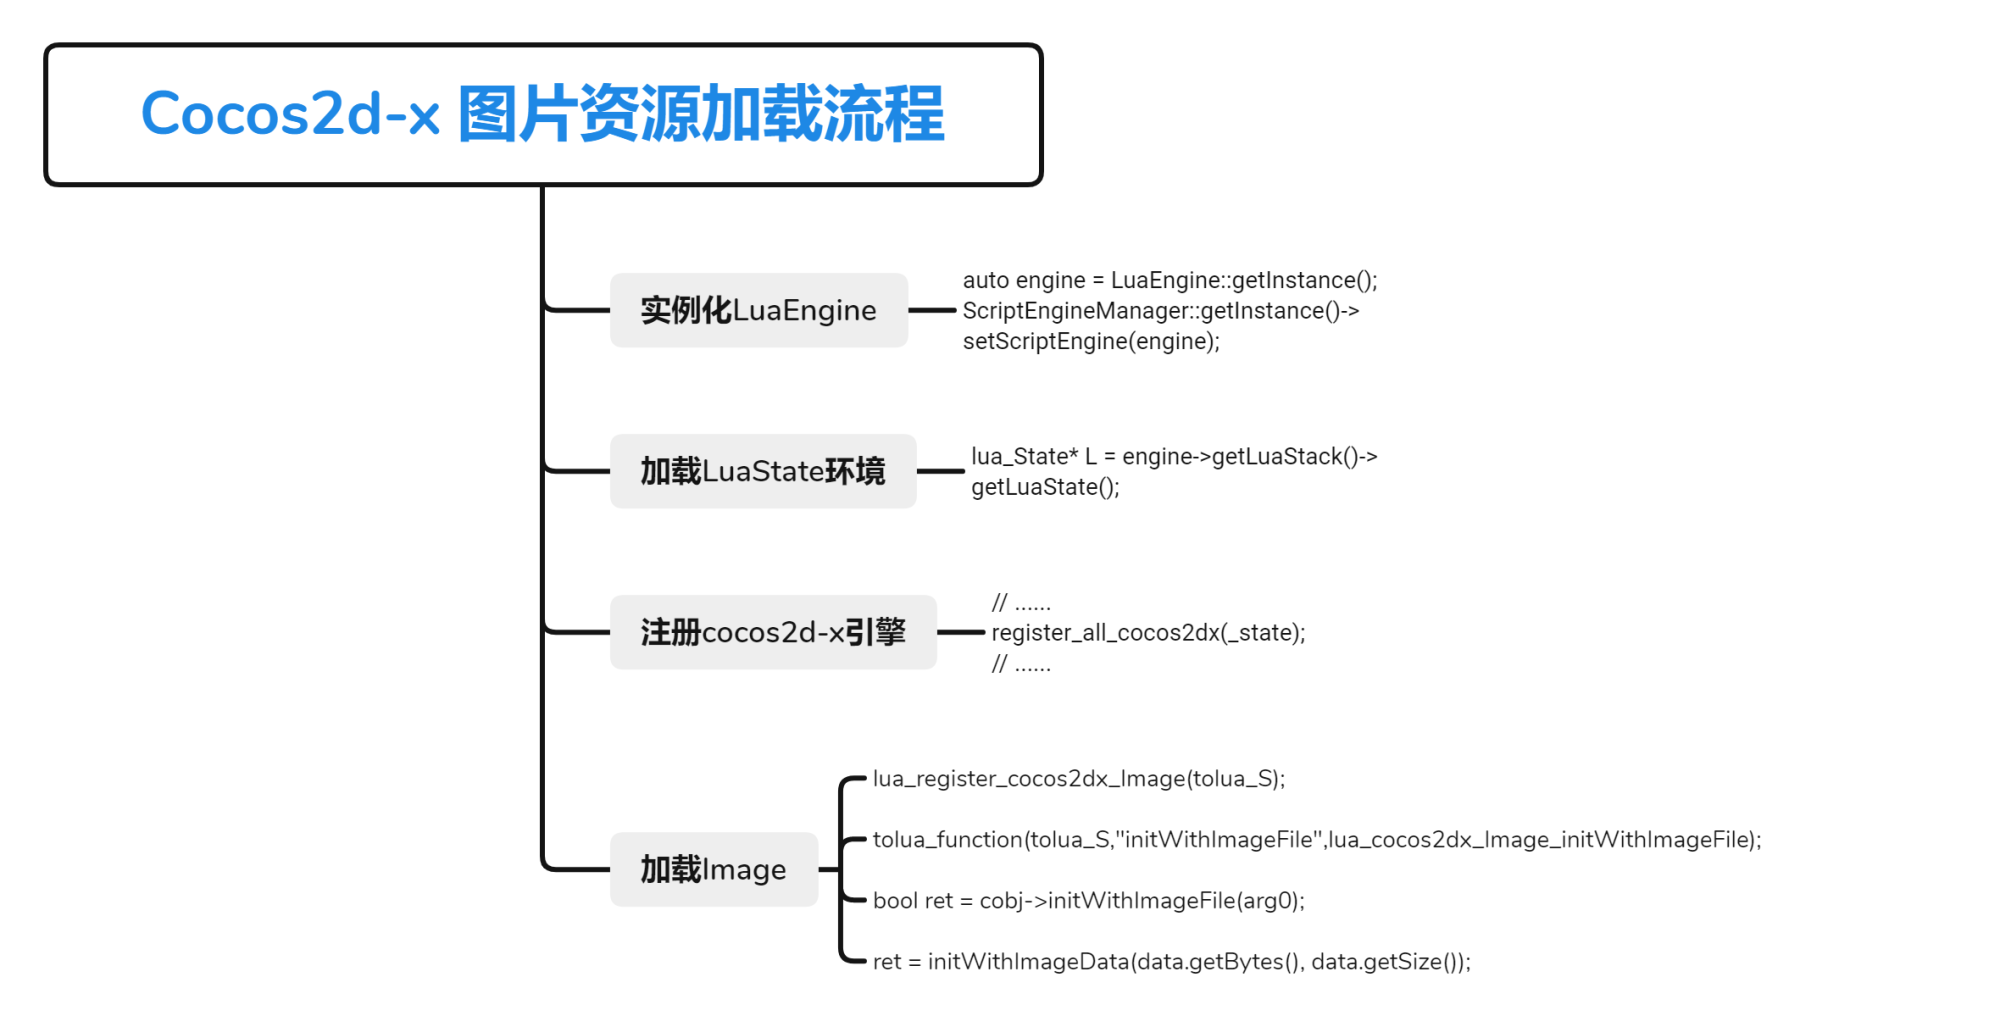
下面是Lua文件主要加载流程图
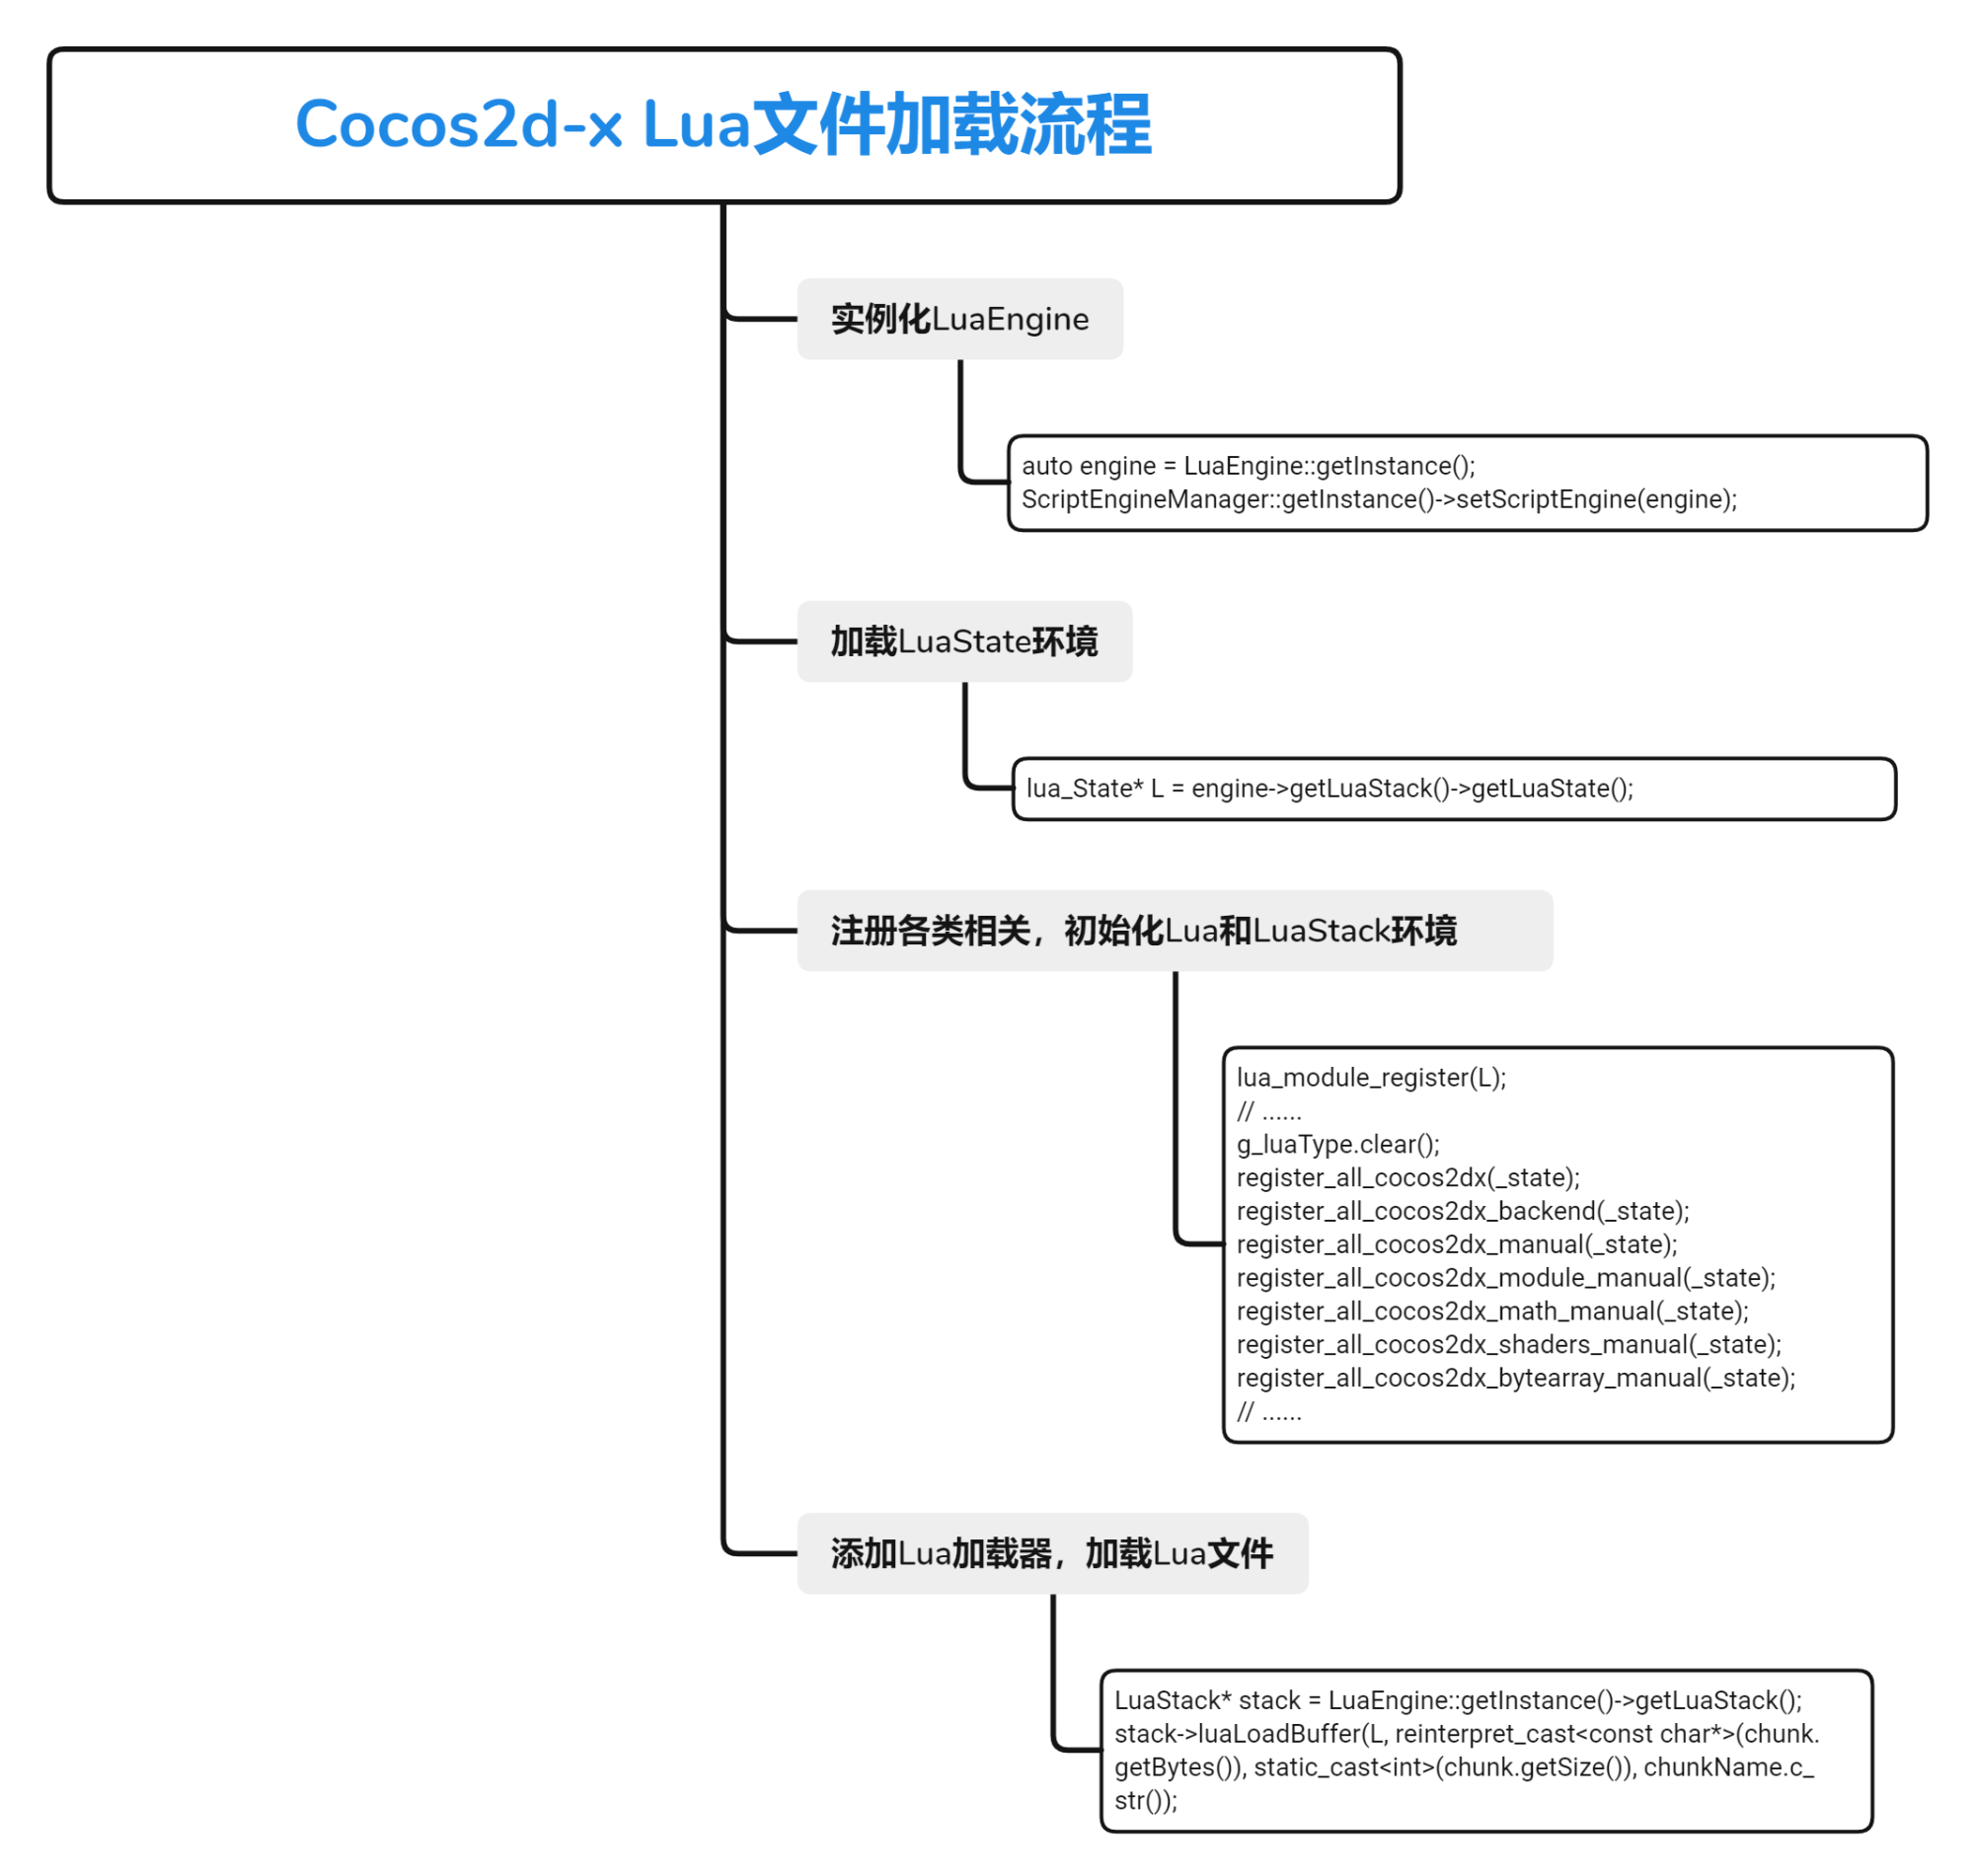
了解了Coco2d-x Lua文件基本的加载流程,可以帮助我们很快的定位关键方法
快速定位由于所有的Lua文件加载必定经过cocos2d:

uaStack::luaLoadBuffer,所以可以直接定位,进行回溯
定位至cocos2dx_lua_loader
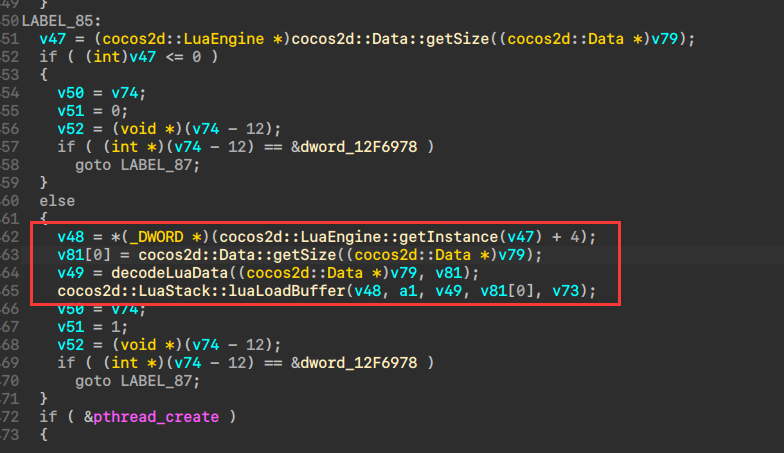
在luaLoadBuffer前调用了decodeLuaData,怀疑这就是解密Lua的关键方法
下面是伪代码
- _BYTE *__fastcall decodeLuaData(cocos2d::Data *a1, int *size)
- {
- _BYTE *v3; // r0
- _BYTE *v4; // r5
- int v6; // r0
- int v7; // r2
- int v8; // r3
- bool v9; // cc
- unsigned int v10; // r1
- _BYTE *v11; // r12
- _BYTE *v12; // r0
- char v13; // t1
- _BYTE *v14; // r0
- char v15[4]; // [sp+0h] [bp-18h]
-
- v3 = (_BYTE *)cocos2d::Data::getBytes(a1);
- v4 = v3;
- if ( *size > 8 && *v3 == 'a' && v3[1] == 'b' && v3[2] == 'c' && v3[3] == 'd' )
- {
- v6 = _hexToDecimal(v3 + 4, 4);
- v7 = *size;
- v8 = 0;
- v9 = *size <= 8;
- v15[3] = v6;
- v15[2] = (unsigned __int16)(v6 - 2048) >> 8;
- v10 = (unsigned int)(v6 - 2048) >> 24;
- v15[1] = (unsigned int)(v6 - 2048) >> 16;
- v15[0] = (unsigned int)(v6 - 2048) >> 24;
- if ( !v9 )
- {
- v11 = v4 - 1;
- v12 = v4 + 7;
- while ( 1 )
- {
- v13 = *++v12;
- ++v8;
- *++v11 = v13 ^ v10;
- v7 = *size;
- if ( *size <= v8 + 8 )
- break;
- LOBYTE(v10) = v15[v8 & 3];
- }
- }
- v14 = &v4[v7 - 8];
- *v14 = 0;
- v14[1] = 0;
- v14[2] = 0;
- v14[3] = 0;
- v14[4] = 0;
- v14[5] = 0;
- v14[6] = 0;
- v14[7] = 0;
- *size -= 8;
- }
- return v4;
- }
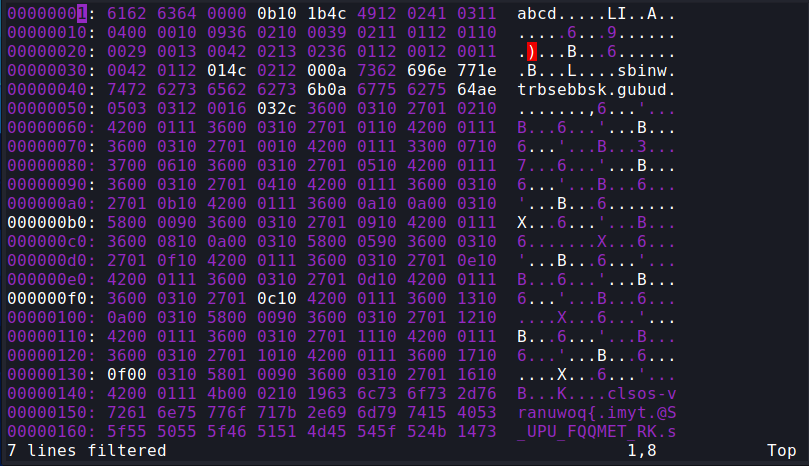
此方法首先获取文件数据,而后判断文件头,文件头正是abcd
可以肯定这就是解密.lua的算法
如果不确定,我们可以使用Frida进行Hook验证猜想
我这里就不Hook了
算法还原要实现算法的还原,我们就要依据伪代码或是汇编代码翻译成可用代码,可以发现IDA所反汇编的伪代码中包含了一些特定的宏,例如:LOBYTE
要了解这些宏的用途,我们可以参考ida_root/plugins/def.h
我这里使用了Python
- import struct
- from loguru import logger
-
-
- def _hexToDecimal(data, offset):
- if offset <= 0:
- return 0
- return struct.unpack(">I", data[:offset])[0]
-
-
- def LOBYTE(d):
- return d & 0xff
-
-
- def decodeLuaData(data, size):
- v4 = bytearray(data)
- v15 = [0] * 4
- if size > 8 and data[0] == ord('a') and data[1] == ord('b') and data[2] == ord('c') and data[3] == ord('d'):
- logger.info("find special exts")
- v6 = _hexToDecimal(data[4:], 4)
-
- v15[3] = v6
- v15[2] = (v6 - 2048) >> 8
- v10 = (v6 - 2048) >> 24
- v15[1] = (v6 - 2048) >> 16
- v15[0] = (v6 - 2048) >> 24
-
- if size > 8:
- i = 0
- while 1:
- v13 = v4[8 + i]
- v4[i] = v13 ^ v10
- i += 1
- if size <= i + 8:
- break
- v10 = LOBYTE(v15[i & 3])
- size -= 8
-
- return v4[:-8]
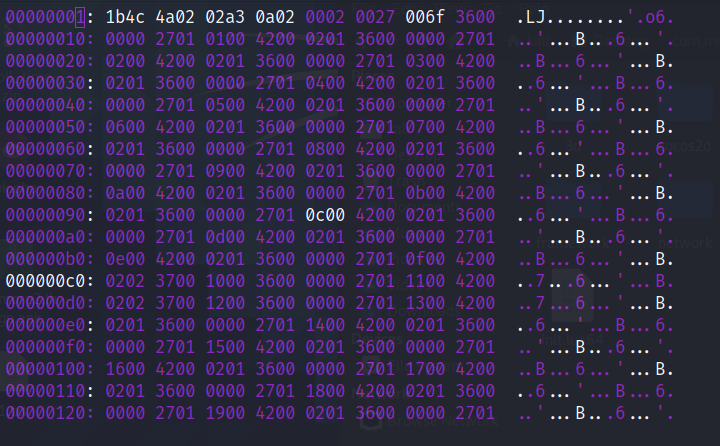
解密后,发现还是LuaJit,那么直接类同.lua64反汇编即可
Lua资源加载流程回到Lua文件加载流程分析时提到的LuaStack::init()方法中,调用了register_all_cocos2dx
复制代码
在大量注册函数中寻找到关键方法lua_register_cocos2dx_Image
- int lua_register_cocos2dx_Image(lua_State* tolua_S)
- {
- tolua_usertype(tolua_S,"cc.Image");
- tolua_cclass(tolua_S,"Image","cc.Image","cc.Ref",nullptr);
-
- tolua_beginmodule(tolua_S,"Image");
- tolua_function(tolua_S,"new",lua_cocos2dx_Image_constructor);
- tolua_function(tolua_S,"hasPremultipliedAlpha",lua_cocos2dx_Image_hasPremultipliedAlpha);
- tolua_function(tolua_S,"reversePremultipliedAlpha",lua_cocos2dx_Image_reversePremultipliedAlpha);
- tolua_function(tolua_S,"isCompressed",lua_cocos2dx_Image_isCompressed);
- tolua_function(tolua_S,"hasAlpha",lua_cocos2dx_Image_hasAlpha);
- tolua_function(tolua_S,"getPixelFormat",lua_cocos2dx_Image_getPixelFormat);
- tolua_function(tolua_S,"getHeight",lua_cocos2dx_Image_getHeight);
- tolua_function(tolua_S,"premultiplyAlpha",lua_cocos2dx_Image_premultiplyAlpha);
- tolua_function(tolua_S,"initWithImageFile",lua_cocos2dx_Image_initWithImageFile); // 初始化图片文件
- tolua_function(tolua_S,"getWidth",lua_cocos2dx_Image_getWidth);
- tolua_function(tolua_S,"getBitPerPixel",lua_cocos2dx_Image_getBitPerPixel);
- tolua_function(tolua_S,"getFileType",lua_cocos2dx_Image_getFileType);
- tolua_function(tolua_S,"getFilePath",lua_cocos2dx_Image_getFilePath);
- tolua_function(tolua_S,"getNumberOfMipmaps",lua_cocos2dx_Image_getNumberOfMipmaps);
- tolua_function(tolua_S,"saveToFile",lua_cocos2dx_Image_saveToFile);
- tolua_function(tolua_S,"setPVRImagesHavePremultipliedAlpha", lua_cocos2dx_Image_setPVRImagesHavePremultipliedAlpha);
- tolua_function(tolua_S,"setPNGPremultipliedAlphaEnabled", lua_cocos2dx_Image_setPNGPremultipliedAlphaEnabled);
- tolua_endmodule(tolua_S);
- std::string typeName = typeid(cocos2d::Image).name();
- g_luaType[typeName] = "cc.Image";
- g_typeCast["Image"] = "cc.Image";
- return 1;
- }
lua_cocos2dx_Image_initWithImageFile加载了我们的图片文件
- int lua_cocos2dx_Image_initWithImageFile(lua_State* tolua_S)
- {
- int argc = 0;
- cocos2d::Image* cobj = nullptr;
- bool ok = true;
-
- #if COCOS2D_DEBUG >= 1
- tolua_Error tolua_err;
- #endif
-
-
- #if COCOS2D_DEBUG >= 1
- if (!tolua_isusertype(tolua_S,1,"cc.Image",0,&tolua_err)) goto tolua_lerror;
- #endif
-
- cobj = (cocos2d::Image*)tolua_tousertype(tolua_S,1,0);
-
- #if COCOS2D_DEBUG >= 1
- if (!cobj)
- {
- tolua_error(tolua_S,"invalid 'cobj' in function 'lua_cocos2dx_Image_initWithImageFile'", nullptr);
- return 0;
- }
- #endif
-
- argc = lua_gettop(tolua_S)-1;
- if (argc == 1)
- {
- std::string arg0;
-
- ok &= luaval_to_std_string(tolua_S, 2,&arg0, "cc.Image:initWithImageFile");
- if(!ok)
- {
- tolua_error(tolua_S,"invalid arguments in function 'lua_cocos2dx_Image_initWithImageFile'", nullptr);
- return 0;
- }
- bool ret = cobj->initWithImageFile(arg0);
- tolua_pushboolean(tolua_S,(bool)ret);
- return 1;
- }
- luaL_error(tolua_S, "%s has wrong number of arguments: %d, was expecting %d \n", "cc.Image:initWithImageFile",argc, 1);
- return 0;
-
- #if COCOS2D_DEBUG >= 1
- tolua_lerror:
- tolua_error(tolua_S,"#ferror in function 'lua_cocos2dx_Image_initWithImageFile'.",&tolua_err);
- #endif
-
- return 0;
- }
下面看cobj->initWithImageFile
- bool Image::initWithImageFile(const std::string& path)
- {
- bool ret = false;
- _filePath = FileUtils::getInstance()->fullPathForFilename(path);
-
- Data data = FileUtils::getInstance()->getDataFromFile(_filePath); // 获取文件数据
-
- if (!data.isNull())
- {
- ret = initWithImageData(data.getBytes(), data.getSize()); // 解码/解密 处理文件数据
- }
-
- return ret;
- }
下面是图片数据格式解码方法initWithImageData
- bool Image::initWithImageData(const unsigned char * data, ssize_t dataLen)
- {
- bool ret = false;
-
- do
- {
- CC_BREAK_IF(! data || dataLen <= 0);
-
- unsigned char* unpackedData = nullptr;
- ssize_t unpackedLen = 0;
-
- //detect and unzip the compress file
- if (ZipUtils::isCCZBuffer(data, dataLen))
- {
- unpackedLen = ZipUtils::inflateCCZBuffer(data, dataLen, &unpackedData);
- }
- else if (ZipUtils::isGZipBuffer(data, dataLen))
- {
- unpackedLen = ZipUtils::inflateMemory(const_cast<unsigned char*>(data), dataLen, &unpackedData);
- }
- else
- {
- unpackedData = const_cast<unsigned char*>(data);
- unpackedLen = dataLen;
- }
-
- _fileType = detectFormat(unpackedData, unpackedLen);
-
- switch (_fileType)
- {
- case Format::PNG:
- ret = initWithPngData(unpackedData, unpackedLen);
- break;
- case Format::JPG:
- ret = initWithJpgData(unpackedData, unpackedLen);
- break;
- case Format::WEBP:
- ret = initWithWebpData(unpackedData, unpackedLen);
- break;
- case Format::PVR:
- ret = initWithPVRData(unpackedData, unpackedLen);
- break;
- case Format::ETC:
- ret = initWithETCData(unpackedData, unpackedLen);
- break;
- case Format::S3TC:
- ret = initWithS3TCData(unpackedData, unpackedLen);
- break;
- case Format::ATITC:
- ret = initWithATITCData(unpackedData, unpackedLen);
- break;
- default:
- {
- // load and detect image format
- tImageTGA* tgaData = tgaLoadBuffer(unpackedData, unpackedLen);
-
- if (tgaData != nullptr && tgaData->status == TGA_OK)
- {
- ret = initWithTGAData(tgaData);
- }
- else
- {
- CCLOG("cocos2d: unsupported image format!");
- }
-
- free(tgaData);
- break;
- }
- }
-
- if(unpackedData != data)
- {
- free(unpackedData);
- }
- } while (0);
-
- return ret;
- }
图片资源的加载到这里就结束了
根据调用流程,我们可以直接定位方法cocos2d::Image::initWithImageData
向上可以追溯到cocos2d::Image::initWithImageFile
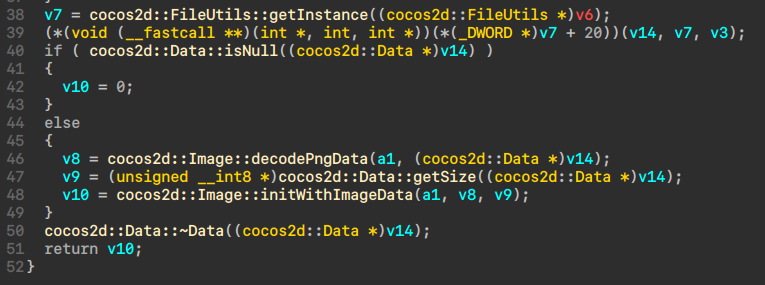
看到了可疑函数cocos2d::Image::decodePngData
- cocos2d *__fastcall cocos2d::Image::decodePngData(cocos2d::Image *this, cocos2d::Data *a2)
- {
- _BYTE *v4; // r7
- int v5; // r5
- signed int v6; // r0
- bool v7; // cc
- int v8; // r4
- void *v9; // r0
- int v10; // r2
- int v12; // r6
- int v13; // r4
- int v14; // r9
- int v15; // r2
- int v16; // r0
- int v17; // r3
- _BYTE *v18; // r5
- unsigned int *v19; // r2
- int v20; // r3
- int v21; // [sp+8h] [bp-28h] BYREF
-
- v4 = (_BYTE *)cocos2d::Data::getBytes(a2);
- v5 = cocos2d::Data::getSize(a2);
- sub_FBDCA8(&v21, (int *)this + 47);
- v6 = sub_FBC854((int)&v21, ".png", 0, 4u);
- v7 = v6 <= -1;
- if ( v6 != -1 )
- v7 = v5 <= 24;
- v8 = !v7;
- v9 = (void *)(v21 - 12);
- if ( (int *)(v21 - 12) != &dword_12F6978 )
- {
- if ( &pthread_create )
- {
- v19 = (unsigned int *)(v21 - 4);
- __dmb(0xFu);
- do
- v20 = __ldrex(v19);
- while ( __strex(v20 - 1, v19) );
- __dmb(0xFu);
- }
- else
- {
- v20 = *(_DWORD *)(v21 - 4);
- *(_DWORD *)(v21 - 4) = v20 - 1;
- }
- if ( v20 <= 0 )
- operator delete(v9);
- }
- if ( v8 && memcmp(&unk_11CBE0C, v4, 8u) ) // PNG Header
- {
- v12 = v5 - 4;
- v13 = v5 - 8;
- v14 = cocos2d::hexToDecimal((cocos2d *)&v4[v5 - 4], (unsigned __int8 *)&byte_4, v10);
- v16 = cocos2d::hexToDecimal((cocos2d *)&v4[v5 - 8], (unsigned __int8 *)&byte_4, v15);
- if ( v5 >= v16 )
- cocos2d::decodePng(v4, (unsigned __int8 *)(v14 - 2048), v16, v17);
- v18 = &v4[v5];
- *(v18 - 1) = 130;
- *(v18 - 2) = 96;
- *(v18 - 3) = 66;
- v4[v12] = 174;
- *(v18 - 5) = 68;
- *(v18 - 6) = 78;
- *(v18 - 7) = 69;
- v4[v13] = 73;
- }
- return (cocos2d *)v4;
- }
明显是一个算法函数,看方法cocos2d::decodePng
- _BYTE *__fastcall cocos2d::decodePng(_BYTE *this, unsigned __int8 *a2, int a3, int a4)
- {
- char v4; // r12
- unsigned int v5; // r1
- int v6; // r12
- char v7[4]; // [sp+0h] [bp-10h]
-
- v7[1] = BYTE2(a2);
- v4 = BYTE1(a2);
- v7[3] = (char)a2;
- v5 = (unsigned int)a2 >> 24;
- v7[2] = v4;
- v6 = 0;
- v7[0] = v5;
- if ( a3 > 0 )
- {
- while ( 1 )
- {
- ++v6;
- *this++ ^= v5;
- if ( v6 == a3 )
- break;
- LOBYTE(v5) = v7[v6 % 4];
- }
- }
- return this;
- }
这里也可以尝试Frida Hook验证猜想
同样的,我就不Hook了
算法还原
- def _hexToDecimal(data, offset):
- if offset <= 0:
- return 0
- return struct.unpack(">I", data[:offset])[0]
-
-
- def LOBYTE(d):
- return d & 0xff
-
-
- def _decodePng(data, magic, rounds):
- dthis = bytearray(data)
-
- v7 = [0] * 4
- a2 = struct.pack("<i", magic)
- v7[1] = a2[2]
- v7[3] = a2[0]
- v7[0] = v5 = magic >> 24
- v7[2] = a2[1]
-
- i = 0
- if rounds > 0:
- while 1:
- i += 1
- dthis[i-1] ^= v5
- if i == rounds:
- break
- v5 = LOBYTE(v7[i % 4])
- return dthis
-
-
- def decodePng(data, size):
- v14 = _hexToDecimal(data[-4:], 4)
- v16 = _hexToDecimal(data[-8:], 4)
- if size >= v16:
- ret = _decodePng(data, v14 - 2048, v16)
- ret[-1] = 130
- ret[-2] = 96
- ret[-3] = 66
- ret[-4] = 174
- ret[-5] = 68
- ret[-6] = 78
- ret[-7] = 69
- ret[-8] = 73
- return ret
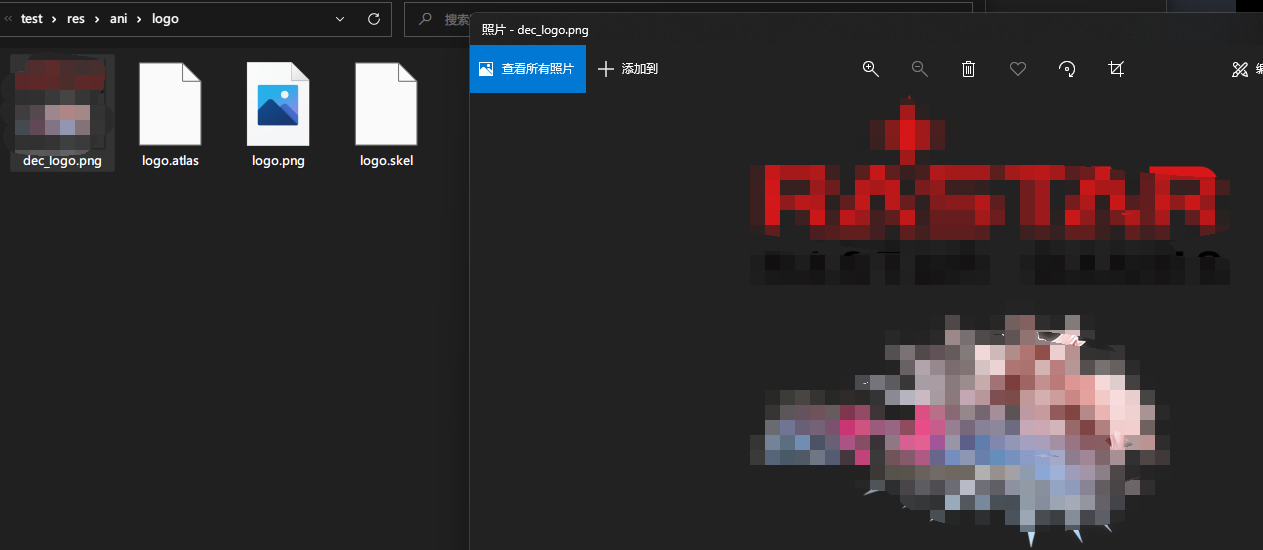
解密结果
 |
|
总结写不出总结啦,大概最大的感想就是:对照源码逆向好爽!!!



 提升卡
提升卡 置顶卡
置顶卡 沉默卡
沉默卡 喧嚣卡
喧嚣卡 变色卡
变色卡 千斤顶
千斤顶 照妖镜
照妖镜